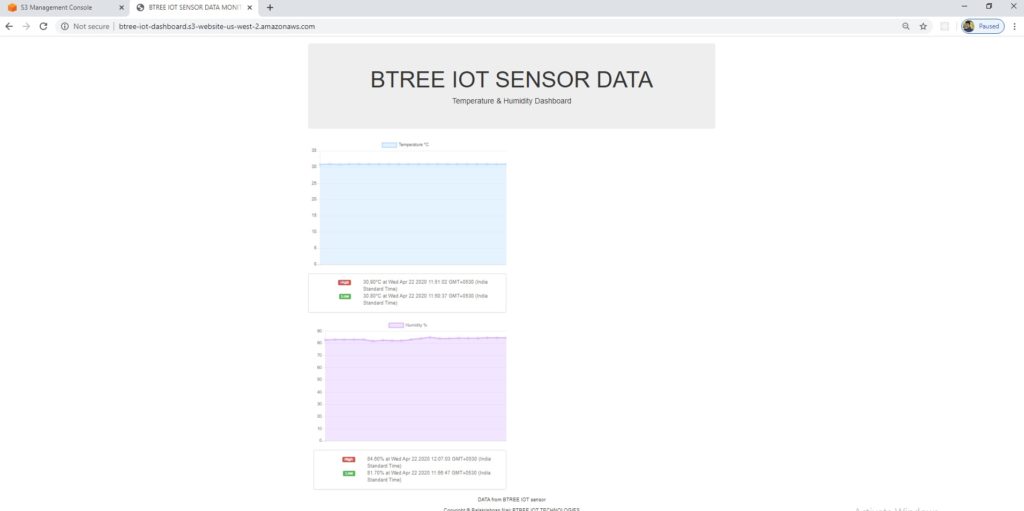
This project is to capture temperature and humidity data from a BTREE IoT SENSOR and send it to a DynamoDB table in AWS cloud server and simultaneously display a live chart on a website url using AWS IoTcore, AWS DynamoDB, AWS S3 website, NodeJS and ChartJS.
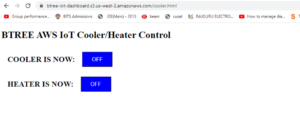
This project also demonstrates how we can control 2 relays that controls a cooler and a heater automatically and manually based on the sensor temperature and humidity values.
When temperature increases from a preset value the cooler will be ON automatically and when the humidity increases from a preset value, then the heater will be ON automatically.
NodeMCU-DHT22>AWS IoT->DynamoDB->NodeJS->ChartJS->AWS S3-website.
AWS Cognito Login page: 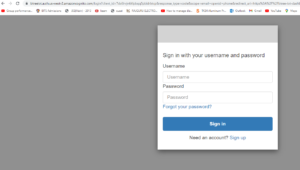
Please check this url for a live view of sensors:
https://btree-iot-dashboard.s3-website-us-west-2.amazonaws.c…
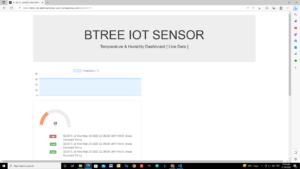
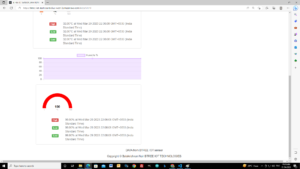
Please check this url for a live view of cooler/heater control:
https://btree-iot-dashboard.s3-website-us-west-2.amazonaws.c…
============================================================
STEPS:
Create a Thing in AWS IoT CORE:
- Create a **Thing** first
- Single Thing
– Create a AWS IoT Thing
- Thing Name
– Provide a **Name** to the Thing
- Create Certificates
– Click on **Create Certificate**
- Download Certificates
Download the following
– Contents for **client_cert[]** from **XXXXXXXXXX.cert.pem**
– Contents for **privkey[]** from **XXXXXXXXXX.private.key**
– Contents for **cacert[]** from **[Root CA ]
- Download the Root CA Certificate
– Download the **RSA 2048 bit key**
- Attach the Policy created
CREATE A PLOICY: – SECURE – POLICIES – CREATE
- Interact with AWs IoT Core – Find the ARN of the thing
A thing Amazon Resource Name uniquely identifies this thing.
Eg: arn:aws:iot:us-west-2:xxxxxxxxxx:thing/btree-iot-sensor
MQTT: MQ Telemetry Transport
It is a publish/subscribe, extremely simple and lightweight messaging protocol, designed for constrained devices and low-bandwidth, high-latency or unreliable networks.
9. CREATE A DynamoDB rule:
AWS-IOT -> ACT -> RULES -> CREATE
mqtt topic name: my/outTopic
Rule: select *, timestamp() AS ts from ‘my/outTopic’
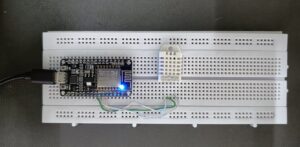
Hardware: NodeMCU ESP8266, DHT22 temperature sensor
Palatform: AWS IoT Core
Programming: Arduino IDE
===============================================
// CODE FOR DHT22 ///////////////////////////////
// GPIO-14 DTH22 – D5 – TEMEPERATURE SENSOR
uint8_t DHTPin = 14; //NODE MCU D5
// Initialize DHT sensor.
DHT dht(DHTPin, DHTTYPE);
void reconnect() {
// Loop until we’re reconnected
while (!client.connected()) {
Serial.print(“Attempting MQTT connection…”);
// Attempt to connect
if (client.connect(“BTREEHOMERELAYS”)) {
Serial.println(“connected”); // Once connected, publish an announcement…
client.publish(“my/outTopic”, “hello world”); // … and resubscribe
client.subscribe(“my/inTopic”);
} else {
Serial.print(“failed, rc=”);
Serial.print(client.state());
Serial.println(” try again in 5 seconds”);
char buf[256];
espClient.getLastSSLError(buf,256);
Serial.print(“WiFiClientSecure SSL error: “);
Serial.println(buf);
// Wait 5 seconds before retrying
delay(5000);
}
}
}
// Load certificate file
File cert = SPIFFS.open(“/cert.der”, “r”);
if (!cert) {
Serial.println(“Failed to open cert file”);
}
else
Serial.println(“Success to open cert file”);
delay(1000);
if (espClient.loadCertificate(cert))
Serial.println(“cert loaded”);
else
Serial.println(“cert not loaded”);
// Load private key file
File private_key = SPIFFS.open(“/private.der”, “r”);
if (!private_key) {
Serial.println(“Failed to open private cert file”);
}
else
Serial.println(“Success to open private cert file”);
delay(1000);
if (espClient.loadPrivateKey(private_key))
Serial.println(“private key loaded”);
else
Serial.println(“private key not loaded”);
// Load CA file
File ca = SPIFFS.open(“/ca.der”, “r”);
if (!ca) {
Serial.println(“Failed to open ca “);
}
else
Serial.println(“Success to open ca”);
delay(1000);
if(espClient.loadCACert(ca))
Serial.println(“ca loaded”);
else
Serial.println(“ca failed”);
}
Message protocol: MQTT
Prerequisite
- Amazon AWS cloud service account
Steps:
- create a thing in AWS IoT core
- generate certificates and download
- create policy
- convert certificate files to .der format
Converting AWS IoT Core credential(Certificate, Private Key, Root CA) from .pem to .der format
There are two main methods for encoding certificate data.
- DER = Binary encoding for certificate data
- PEM = The base64 encoding of the DER-encoded certificate, with a header and footer lines added.
Installing OpenSSL
OpenSSL open-source implementation of SSL and TLS protocols and that can be used to convert the certificate files into the most popular X.509 v3 based formats.
We will convert the .pem files to .DER.
Linux: install OpenSSL with the following YUM console command:
yum is the primary tool for getting, installing, deleting, querying, and managing Red Hat Enterprise Linux RPM software packages from official Red Hat software repositories, as well as other third-party repositories
$ yum install openssl
> openssl x509 -in 1234561-certificate.pem.crt.key -out cert.der -outform DER > openssl rsa -in 1234561-private.pem.key -out private.der -outform DER > openssl x509 -in G2-RootCA1.pem.txt -out ca.der -outform DER
- Downloaded the converted certificate files into the NodeMCU ESP8266 SPIFFS file system.
- Copy the AWS_endpoint which is the address of the MQTT broker for your AWS account in a specific region.
- Place it in aurdino code:
const char* AWS_endpoint = “xxxxxxxxxxxxxx-ats.iot.us-west-2.amazonaws.com”; //MQTT broker ip
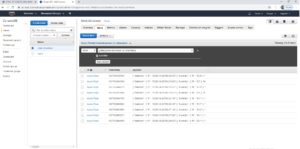
Create DynamoDB – Tablename: btree_iot_table
schema:
id string ( for mqtt topic )
timestamp number ( time & day timestamp value )
Setting up Amazon DynamoDB
- Setting up Amazon DynamoDB & Creating a rule to fetch data from the MQTT topic then pass to DynamoDB.
- Implementation of code to post mac_Id, random_number, randon_string from ESP8266 to AWS
- Demo: Data Storing into the Amazon DynamoDB
Before diving into this tutorial make sure you have comple
Before diving into this tutorial make sure you have completed the following two steps because this tutorial is a continuation of the following to tutorials.
1. Creating an Amazon DynamoDB rule and Setting up a DynamoDB data table.
What is AWS Rule? what it does???
An AWS IoT rule consists of an SQL SELECT statement, a topic filter, and a rule action. Devices send information to AWS IoT by publishing messages to MQTT topics. The SQL SELECT statement allows you to extract data from an incoming MQTT message. The topic filter of an AWS IoT rule specifies one or more MQTT topics. The rule is triggered when an MQTT message that matches the topic filter is received on a topic. Rule actions allow you to take the information extracted from an MQTT message and send it to another AWS service. Rule actions are defined for AWS services like Amazon DynamoDB, AWS Lambda, Amazon SNS, and Amazon S3. By using a Lambda rule, you can call other AWS or third-party web services. For a complete list of rule actions, see AWS IoT Rule Actions.
Creating an Amazon DynamoDB rule.
DynamoDB rules allow you to take information from an incoming MQTT message and write it to a DynamoDB table.
table Name: btree-iot-sensor
coloums: id, string – add sortkey – yes
timestamp, number
create
mqtt topic name: my/outTopic
Rule: select *, timestamp() AS ts from ‘my/outTopic’
publish topic to test
eg:
{
“mac_Id”: “12345”,”temperature”: “32.50”, “humidity” : “83.50”
}
Testing comments…
I need to to thank you for this good read!! I certainly enjoyed every bit of it. I have you saved as a favorite to look at new things you postÖ
Thank you.
I was very pleased to uncover this great site. I need to to thank you for ones time due to this fantastic read!! I definitely enjoyed every bit of it and I have you book-marked to see new things in your website.
I was excited to uncover this site. I need to to thank you for your time for this wonderful read!! I definitely enjoyed every bit of it and I have you bookmarked to look at new things on your website.
I am not sure where you’re getting your info, but good topic. I needs to spend some time learning much more or understanding more. Thanks for magnificent info I was looking for this information for my mission.
Thanks I have just been looking for information about this subject for a long time and yours is the best Ive discovered till now However what in regards to the bottom line Are you certain in regards to the supply